"Fox" in airbrush technique with AERO COLOR® Professional - by Melina Wuggonig
In this blog post, 19 years-old airbrush autodidact Melina Wuggonig shows a freehand work with the airbrush gun and Schmincke AERO COLOR® Professional colours. We are eager to show you step by step, how she creates a highly realistic-looking fox.
You will need:
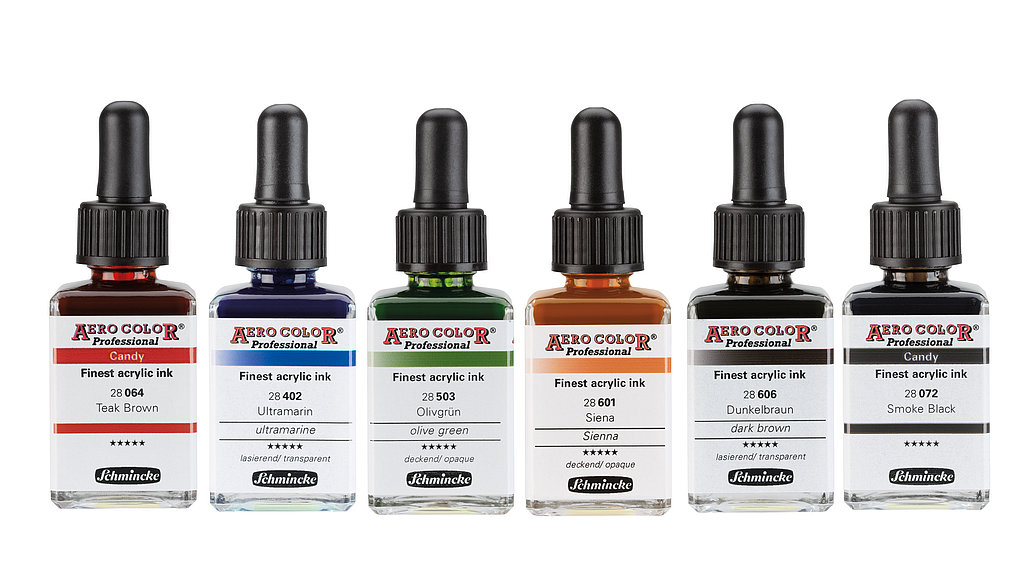
- Schmincke AERO COLOR® Professional: Dark Brown 606, Teak Brown 064, Burnt Sienna 604, Sienna 601, Brazil-Brown 602, Smoke Black 072, Black 702, Olive Green 503, Ultramarine 402, SUPRA White Opaque 101
- Thinner: distilled water
- Substrate: Aluminium Dibond board
- Airbrush: e.g. Iwata CM-Sb 0.18 and Iwata HP-B+. Recommended nozzle size between 0.18 and 0.3 mmOthers: grey sanding fleece fine, degreaser or silicone remover, adhesive tape for the edges, template and for transferring possibly graphite paper
Tip: It is convenient to work with two airbrush guns - one filled with white and the other for the rest of the colours.
Step 1
First, I cut my aluminum Dibond plate to size and use a fine sanding fleece to sand the surface. Then it is important to degrease the plate carefully to remove dirt and to avoid problems with the paint application later. Therefore, I use a silicone remover and wipe the surface several times.
Since I like to have clean edges on my aluminum paintings, I tape them to the desired width. I print out the template image in the size of the plate and transfer the most important contours using graphite paper.
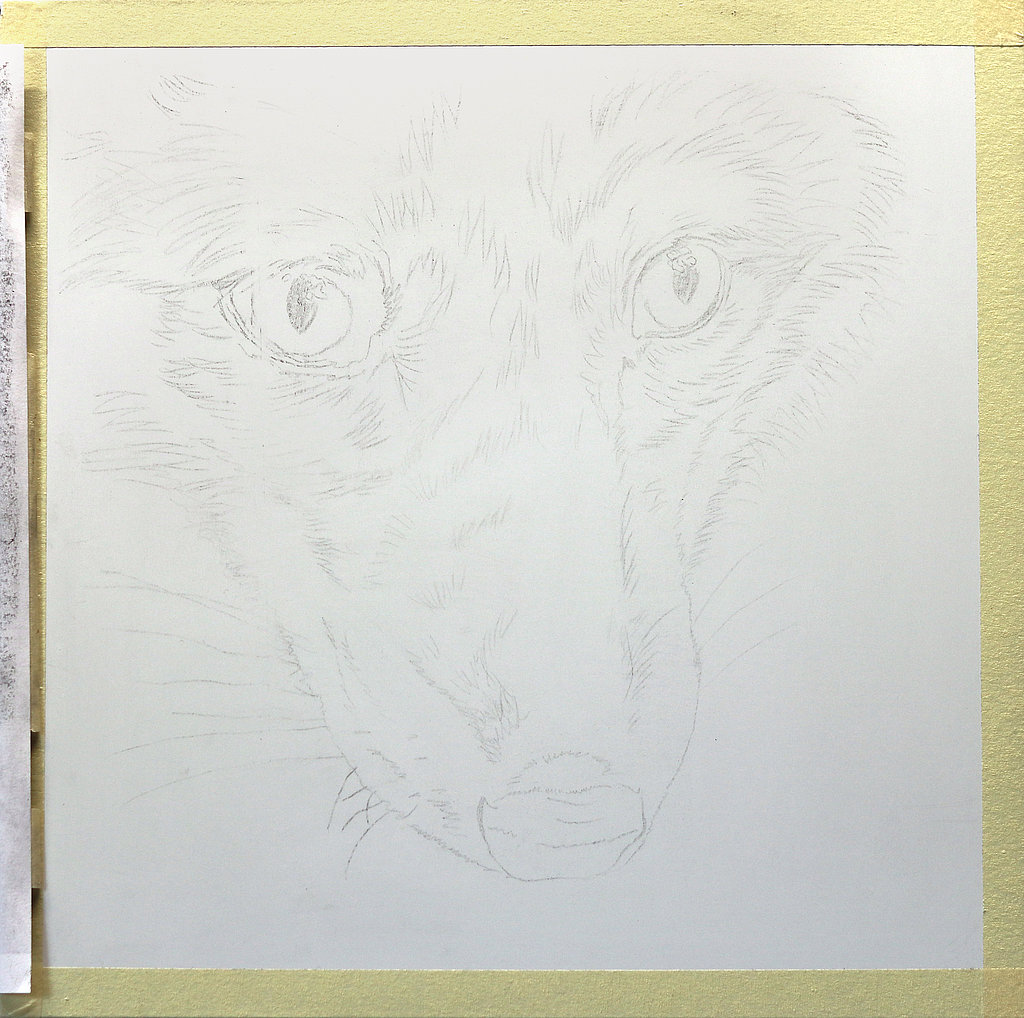
Step 2
Now I start working out my tonal values and the shapes of the fox and create my base layer. Therefore, I use undiluted AERO COLOR® Professional Smoke Black. It is very important to create this first layer very dark, because later I want to layer my details on top of it with light colours to achieve enough contrast. In this step I do not focus on individual hair or small details, but only spray the shadow areas relatively roughly and try to work out the shape of the head.
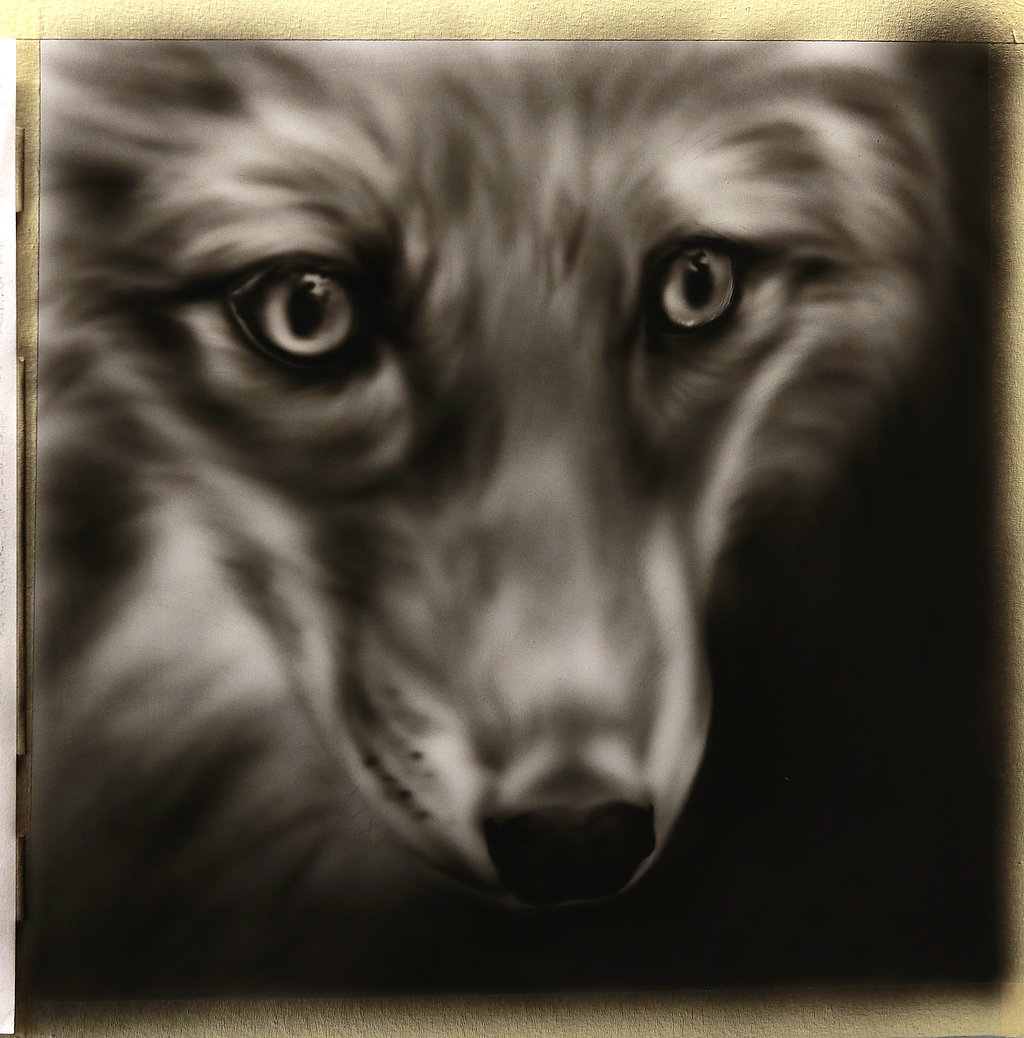
Step 3
Now I spray my black undercoat with AERO COLOR® Professional Burnt Sienna, Teak Brown and Brazil-Brown, comparing regularly with the photo template to reproduce the colours correctly. In this step, I also spray the colours undiluted and very intensively. It is important to colour the supposedly white areas as well, since I want to airbrush the fur with white, too.

Step 4
Now I start with the detail work, probably the most difficult step of the whole painting. To airbrush the fur structure realistically, you need a very good control over your airbrush gun and a feeling for the length and shape of the individual hair. For this step I use the SUPRA White opaque and dilute it with about 20% distilled water or reducer. With my Iwata CM-Sb 0.18 I spray the fine hairs at about 2.5 bar.
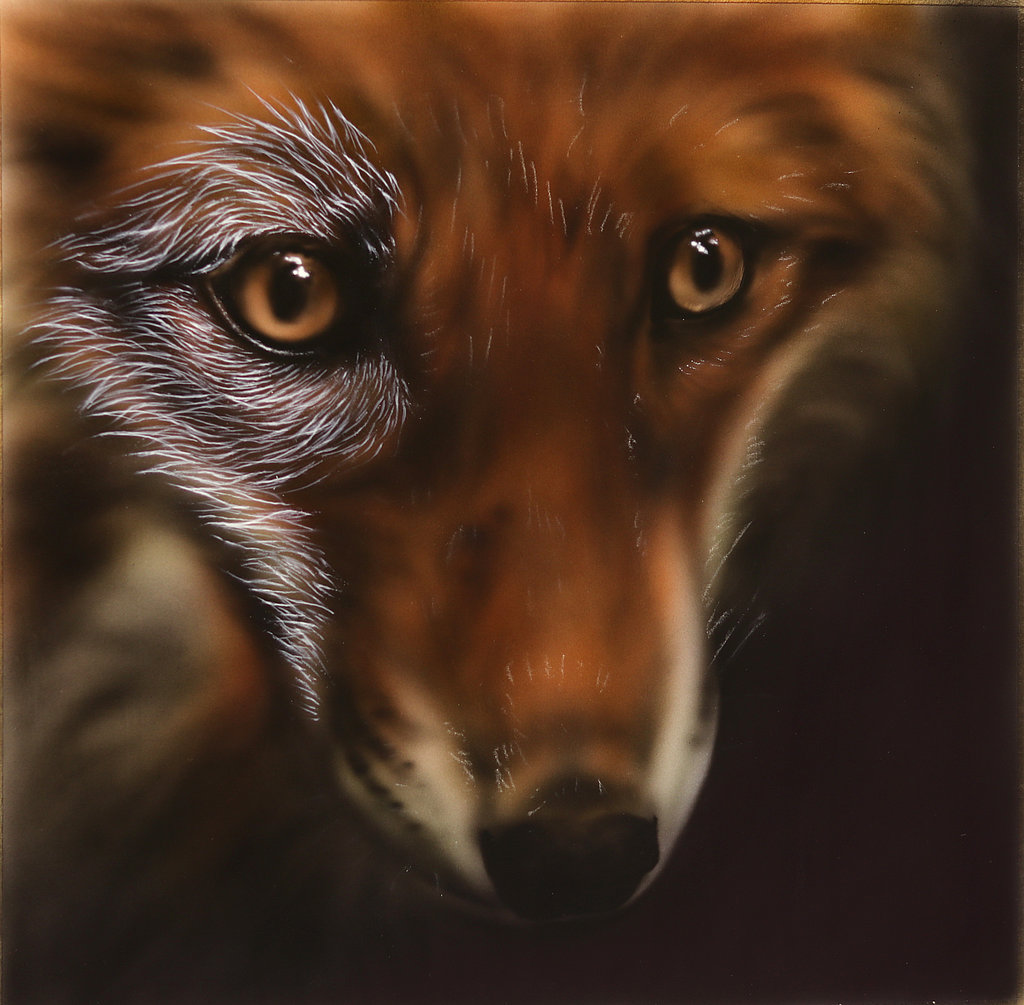
Step 5
This step needs a lot of patience. Thoroughly I work my way through the coat structure and brush the fine hairs. In the first coat layer, it is important not to place the hairs too close together, but to let the lower layers shine through. I use my photo template to analyse how long and curved the hairs are in the respective area and in which direction they grow. In the eyes, I've only hinted a shape and highlighted the light reflections with white. At the nose, I very slightly hint the structure with small dots and leave the shadow area of the nose dark.
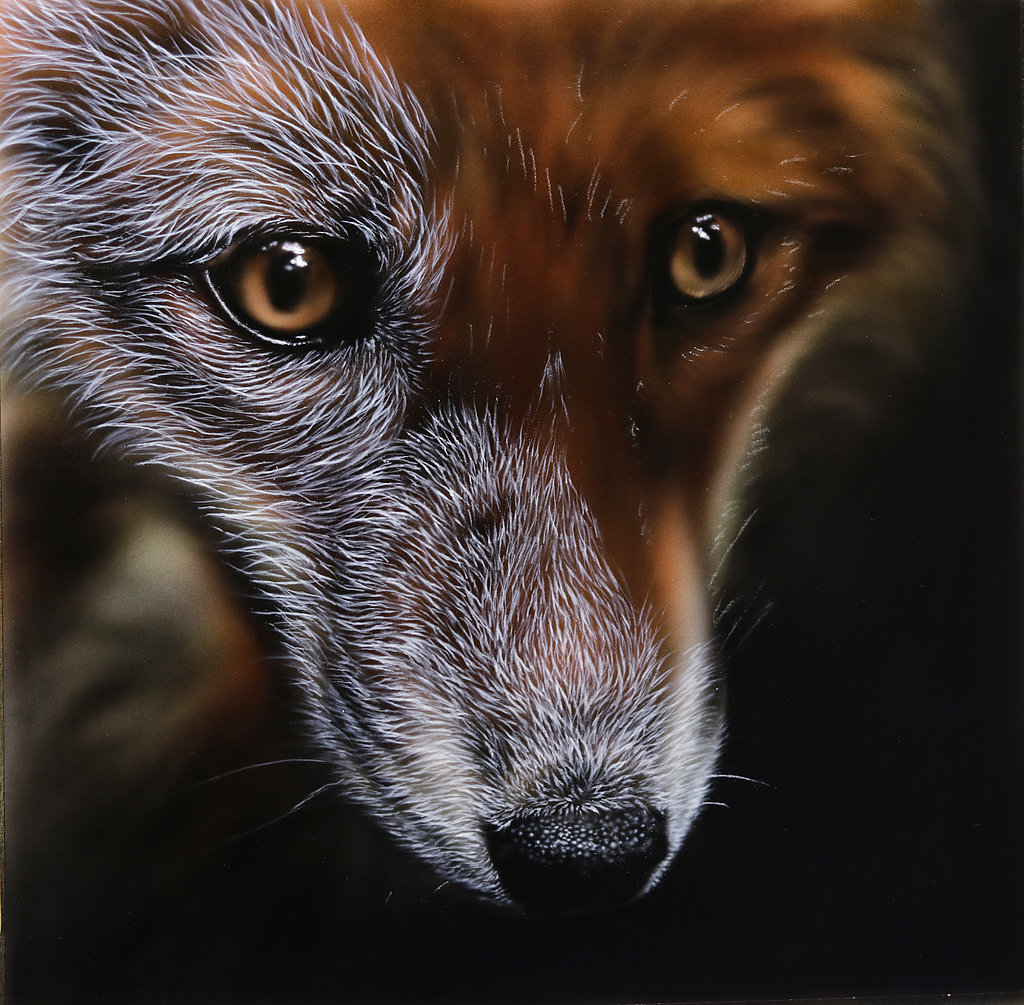
Step 6
This is what the first finished coat layer looks like. I slightly blur the fur in the neck area by spraying at a greater distance from the painting. This blur area gives my painting a nice depth effect.
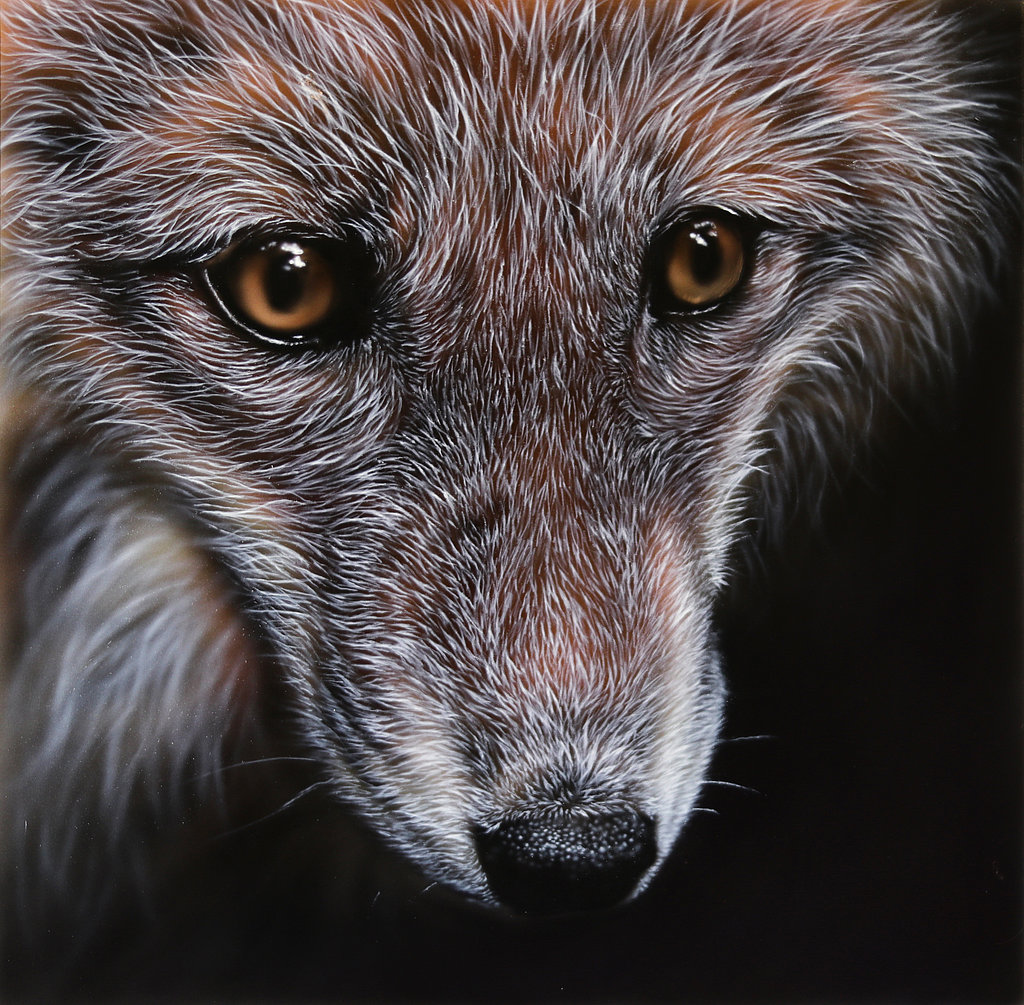
Step 7
Now I apply a second coat of undiluted SUPRA White opaque. Airbrushing with white colour brings some difficulties and the thicker the paint is sprayed, the more tricky it is to create fine lines. So, if you have trouble with this, you can also thin the paint slightly in this step.
At this point I've given my fox a very realistic and detailed fur texture and all he really needs now is the right colour. The realistic fur structure comes from the fact that my lines overlap and cross each other again and again or several hairs form one strand. It is important, however, to still be able to see through the layers below in the fur gaps and not to paint the hairs too densely.
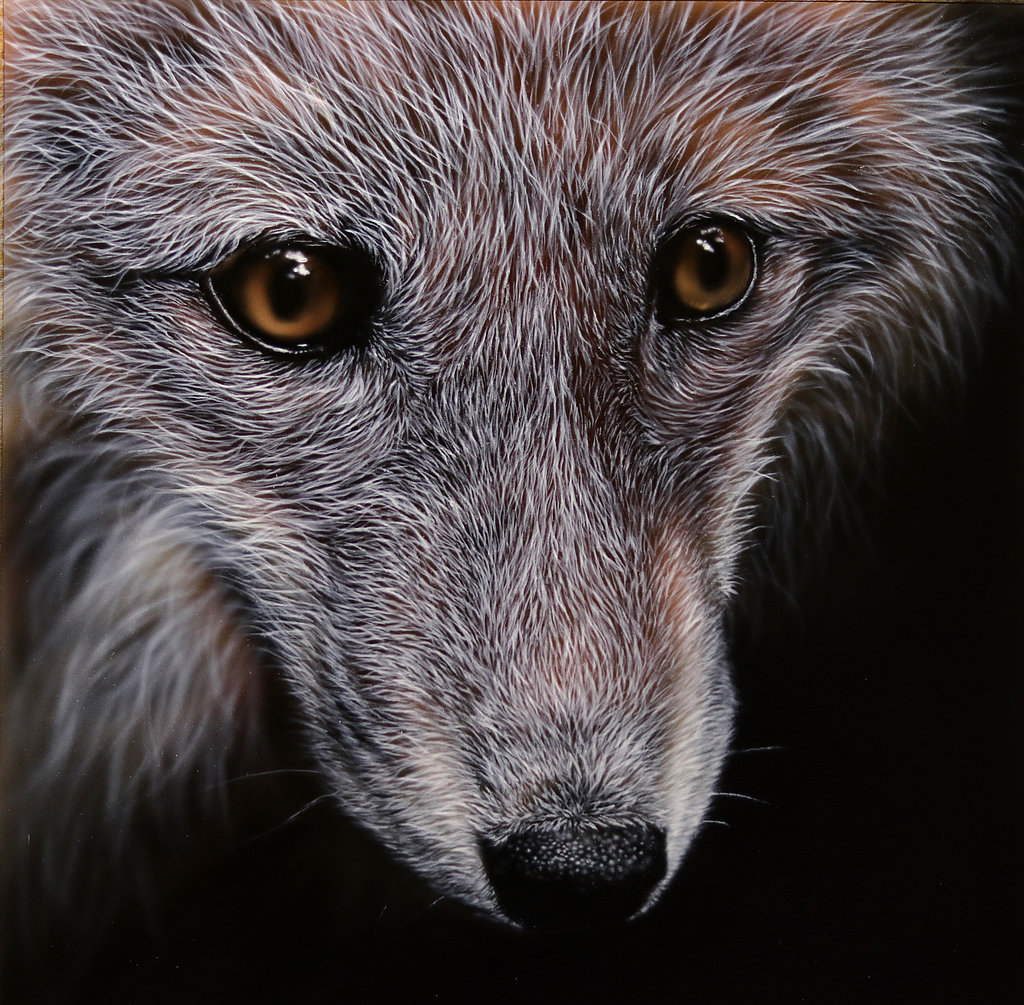
Step 8
Finally, it's time for the colour! Once I'm satisfied with my white coat, I can colour the fox. Therefore, I always use my AERO COLOR® Professional diluted by half and spray the colour in thin layers with more distance to the painting. First, I use Burnt Sienna, then I add a little contrast with the Brazil- Brown and Teak Brown. I don't want any red or brown paint mist to get into the white coat area. Here I carefully use some Ultramarine Blue and in the neck area some Olive Green.
In this step I also work out the details in the eyes and give the fox its expression. Again, I start by working out the structure of the iris with white. Then I colour the eyes with Burnt Sienna and Sienna. I deepen the darkest areas of the eye with Black for optimal contrast.
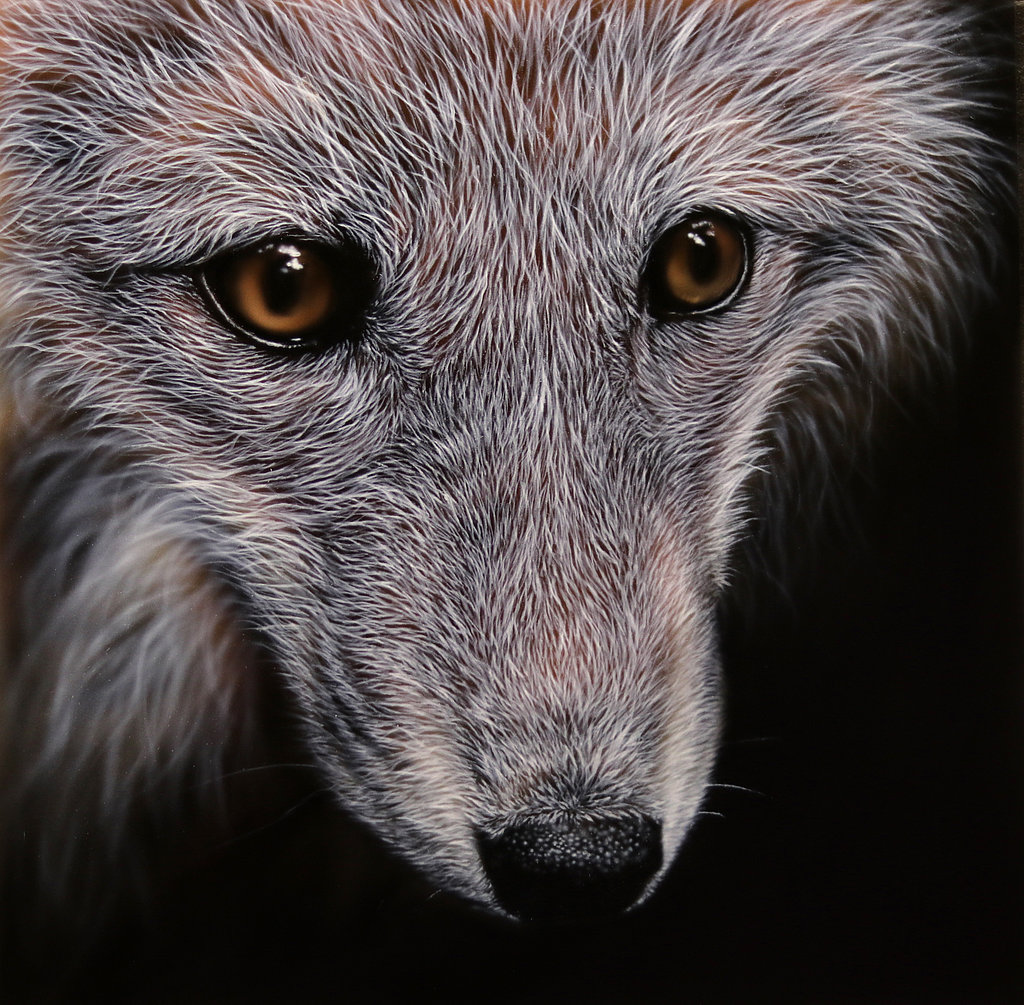
Step 9
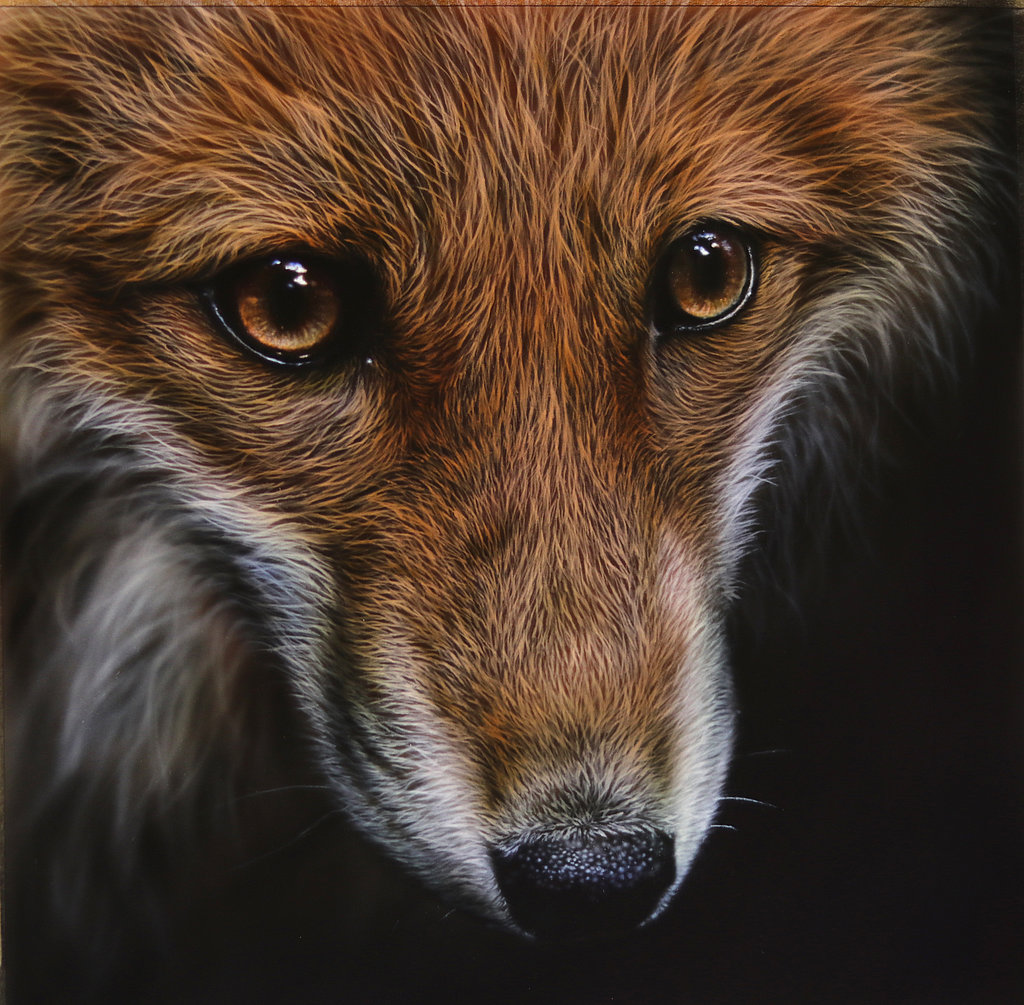
In the last step I add some highlights. I lighten the white fur areas even more with SUPRA White opaque and add the tactile hairs on the muzzle. With a mixture of Sienna and SUPRA White I work out the light coat tips. Therefore, I try to lighten only the tips of the hair with this colour and do not work more in the dark areas. With Dark brown I can still paint in my fur gaps a little more depth, if necessary.
Step 10
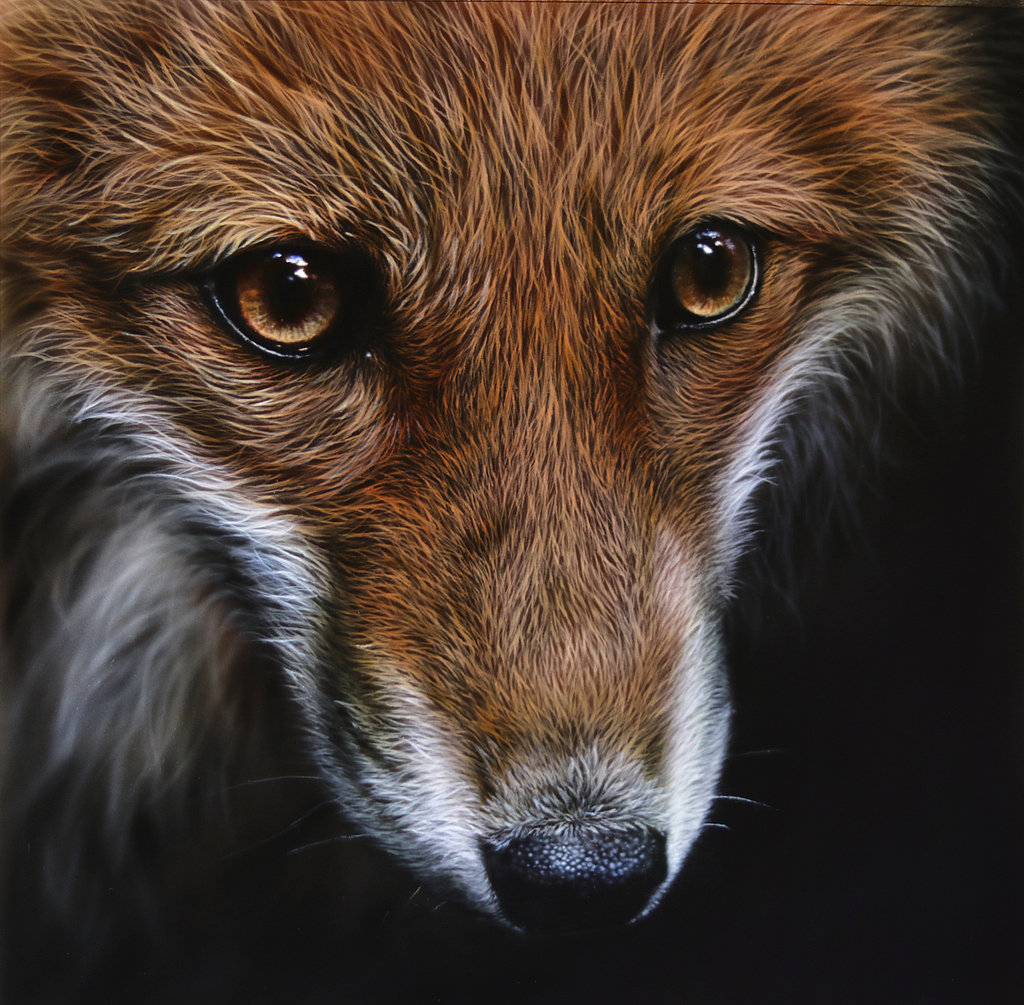
Last but not least comes the best step: I can remove the tape and get a perfect border of my artwork and the picture is almost finished. My signature on the edge of the painting is now my last step.
The artist
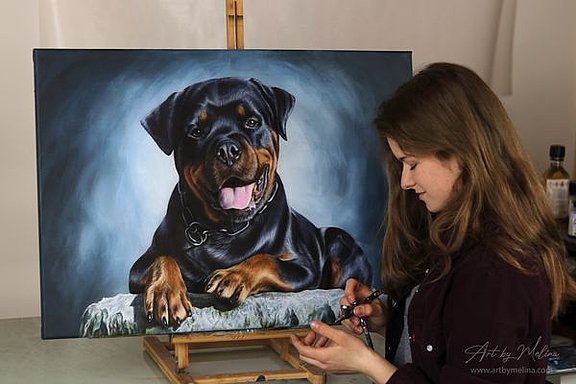
I am a 19-year-old artist from Carinthia (Kärnten/ Austria) with a great passion for animals and my horses. I have always loved to draw and to incorporate the animals on my drawing sheets. At the age of 13 years, I have tried for the first time to paint animal and human portraits after photo templates and soon after also executed my first commissioned works. It wasn't until 2018 that I found interest in airbrushing and started combining my coloured pencil works with airbrush technique.The handling of the respective materials and the various techniques I have acquired all self-taught and continue to develop. At the beginning of 2021 I have fulfilled a big dream and made my hobby a profession. I draw and paint realistic animal and human portraits in many different techniques, design helmets or motorcycle parts with eye-catching airbrush designs or even large-scale murals in the desired style.I also have a degree in graphic design and create logos, corporate identities, and promotional prints for clients. Last year I already had the privilege to teach my airbrush techniques internationally and since a few weeks I also offer my coloured pencil and airbrush techniques in the form of online tutorials on Patreon.
Webseite: www.artbymelina.com
Instagram: @art_by_melina
Facebook: Art by Melina
Teaching, Tutorials auf Patreon: Art by Melina

