


Imaginative, colourful painting with HORADAM® AQUARELL & waterproof ink by Stéphanie Kilgast
An imaginative, luminous mixture of brilliant watercolours applied in several layers and fine black ink drawing, when skillfully combined, creates a unique effect. French artist Stéphanie Kilgast shows us step by step how she goes about it.
Material:
- Paper: hot pressed, 100 % cotton 300 g/m2 watercolour paper
- Pencil between 3H, 2H, H or HB
- Drawing pen with a hard nib (Holbein Tachikawa Penholder T-40 + Holbein Nikko School Pen N5-3)
- Waterproof black ink (DeAtrementis Black) or new as of 2022 - Schmincke Indian Ink 1912
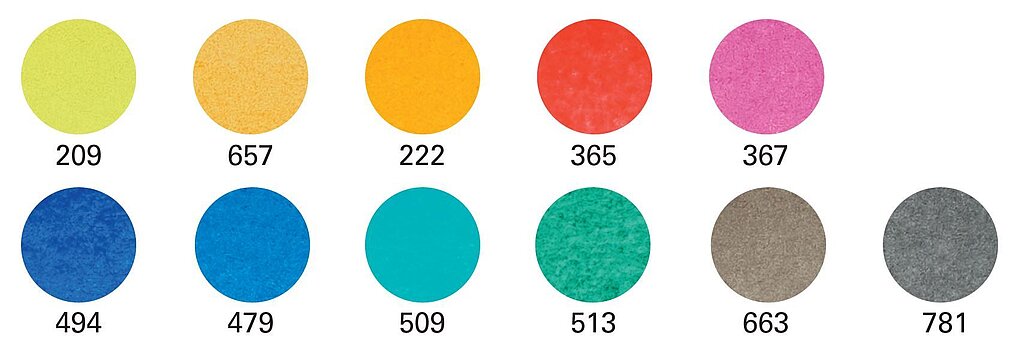
- Colours - HORADAM® AQUARELL: 209 transparent yellow, 657 transparent ochre, 222 yellow orange, 365 vermillion, 367 purple magenta, 494 Ultramarine finest, 479 Helio cerulean, 509 cobalt turquoise, 513 viridian, 663 sepia brown, 781 lamp black
Step 1
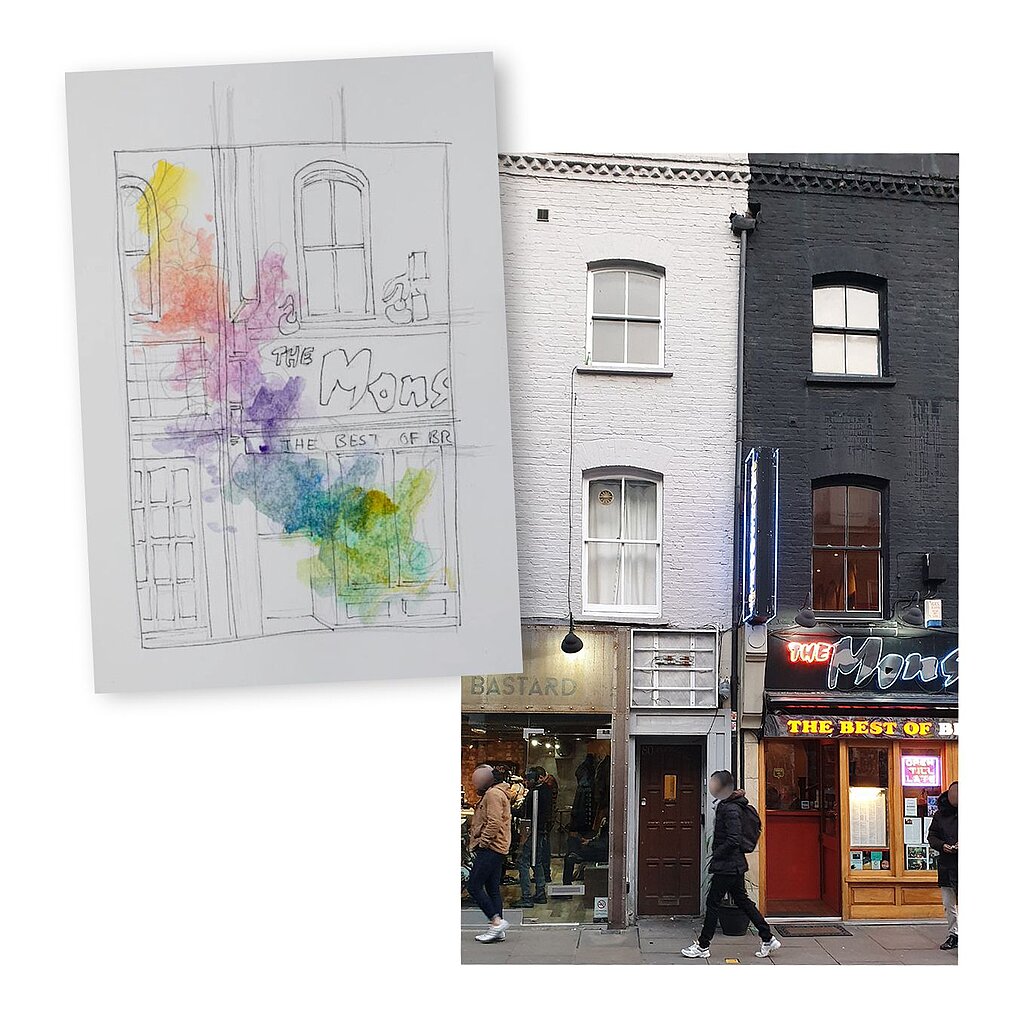
I always use reference pictures in my work, usually my own pictures of things I find interesting.
For this painting, I was looking for something urban as a base. So, after looking through hundreds of building pictures, I decided to go for this shot I took in London. I then tried out a few different compositions before settling on one I liked.
I never trace my reference pictures because I often change proportions and angles. I also simplify certain parts while over-detail others.
Step 2
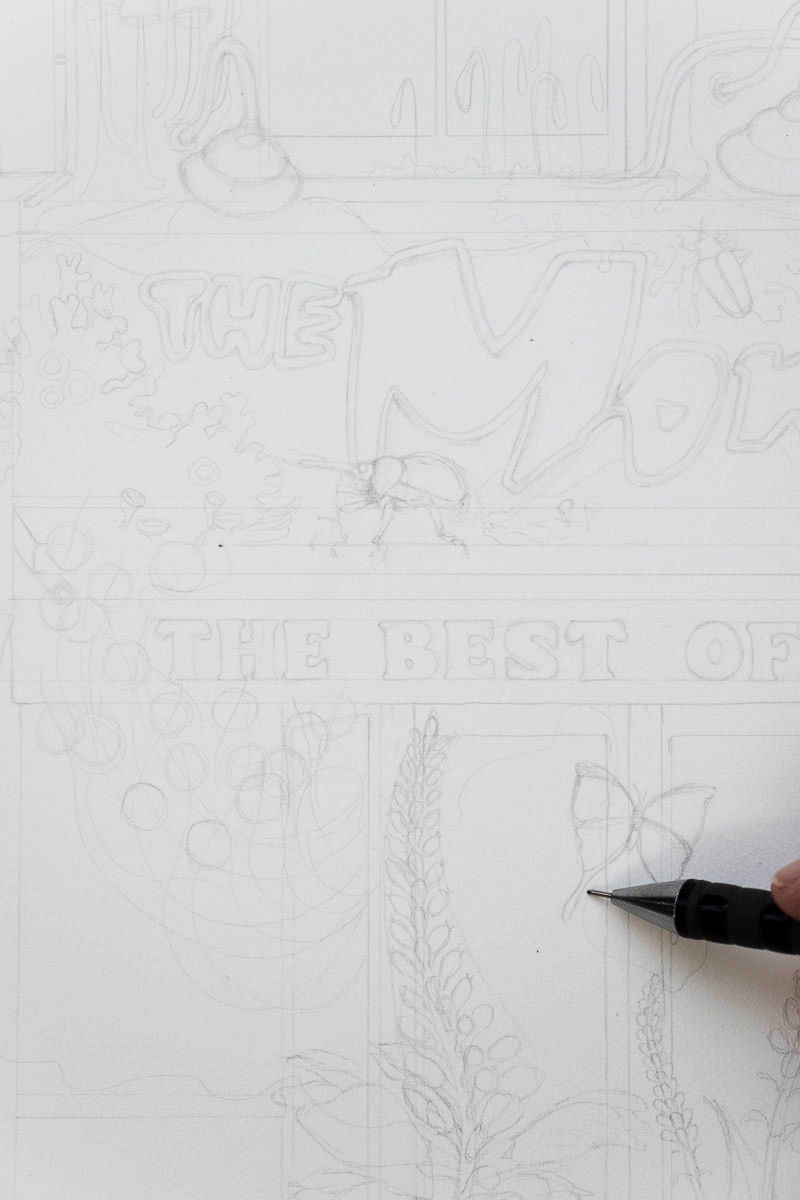
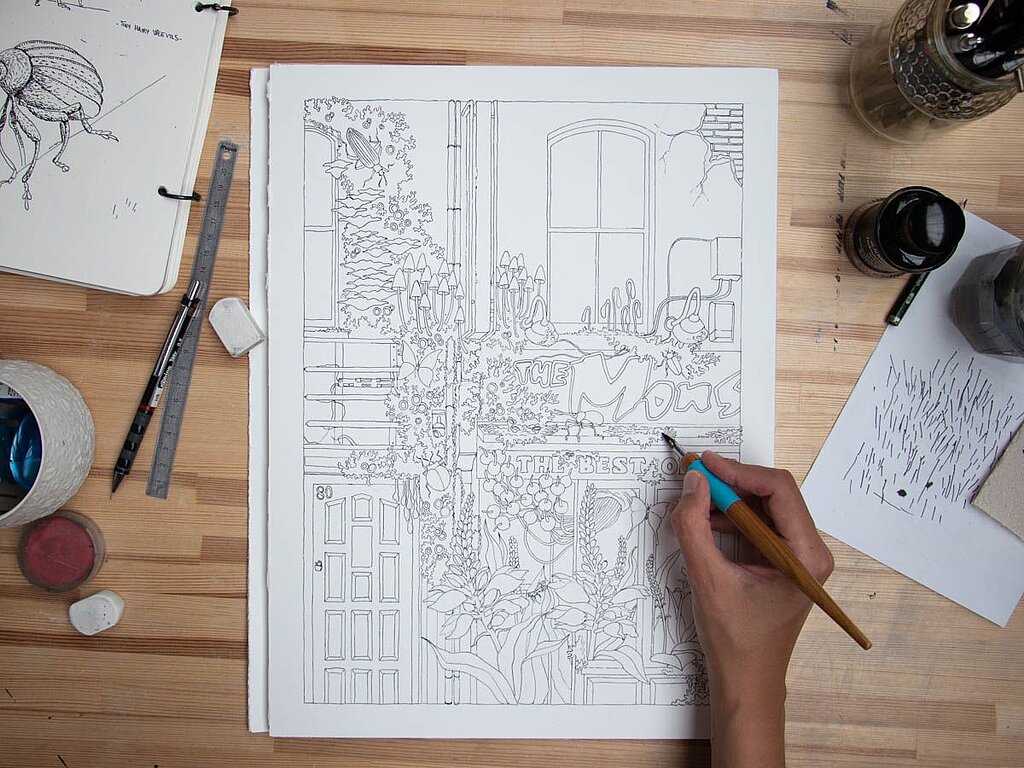
Once I know what I want, it's time to draw.I am using a hot pressed cotton paper of 300g/m2. This is pretty standard when working with ink and watercolour. You want a paper that is smooth, so your lines are nice and straight. I prefer harder pencils or lead holders, anything between 3H and HB will do, and I keep my touch very light. Please bear in mind that the pictures you see in this article are edited so you can see the drawing. I start with the building, putting things into place and using a ruler to have straight lines.Then I add all the natural growth and insects on top. For the plants and animals, it's a mixture of painting from memory and using reference pictures. As with the buildings, I always take pictures of plants or insects I find interesting. However, if using photography that isn't your own, make sure never to copy the photography exactly, instead use several pictures of the subject you are trying to understand and make an effort to draw it from scratch, so it fits your composition.
Step 3
The drawing part is truly the longest, as it is the moment you have to make all the decisions. As this is tiring and sometimes you need more time for certain areas, I tend to go back and forth between drawing and inking rather than finishing the drawing first and then inking.
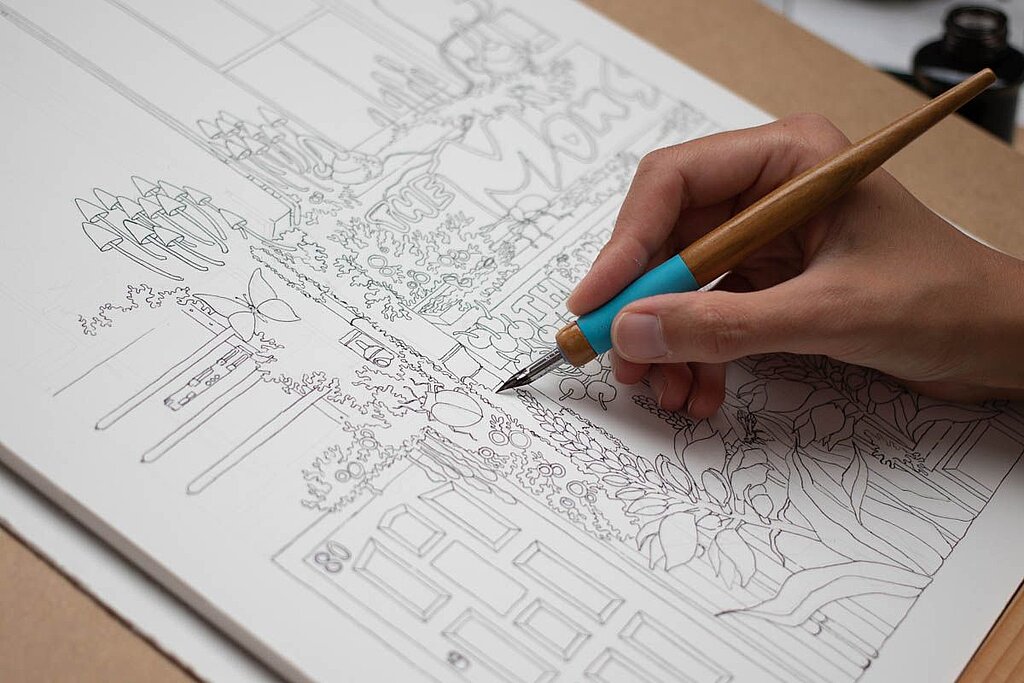
For the inking, I use the traditional dip pen and ink technique. Since I work mainly in the studio, this is the easiest for me. However, if you are on the road a lot, you can also use a fountain pen with converter, just make sure your ink is fountain pen compatible (the Indian Ink 1912 do not work in fountain pen) and don't leave the ink in your fountain pen for a long time without using it. For this painting, I am using waterproof De Atrementis black ink. For the nib, I prefer a hard and fine nib, as I want my lines to have a consistent thickness.
Step 4
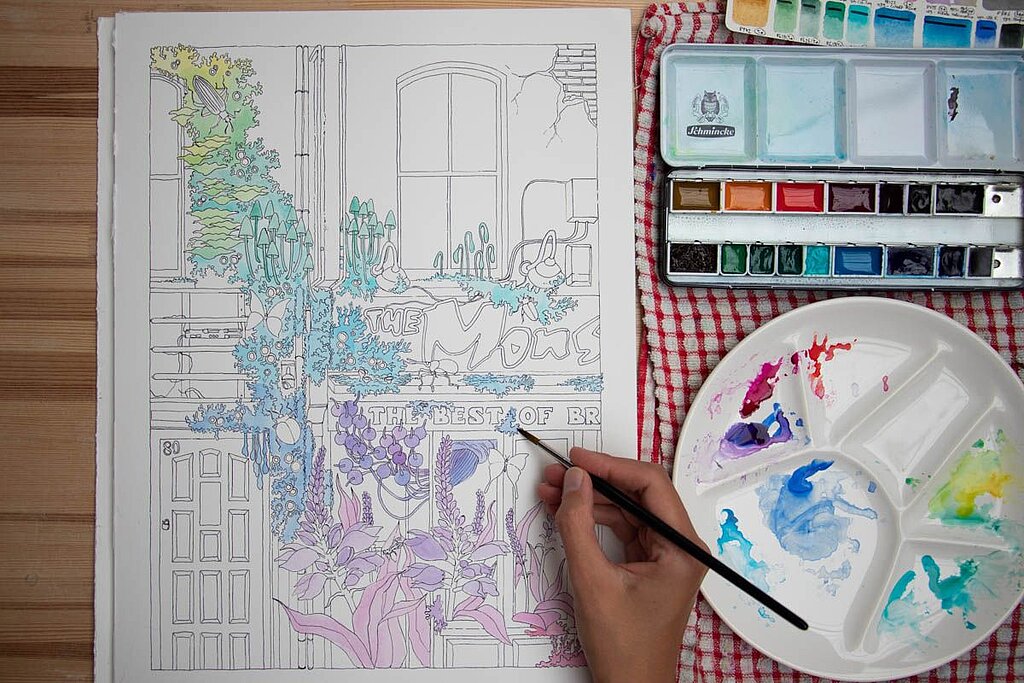
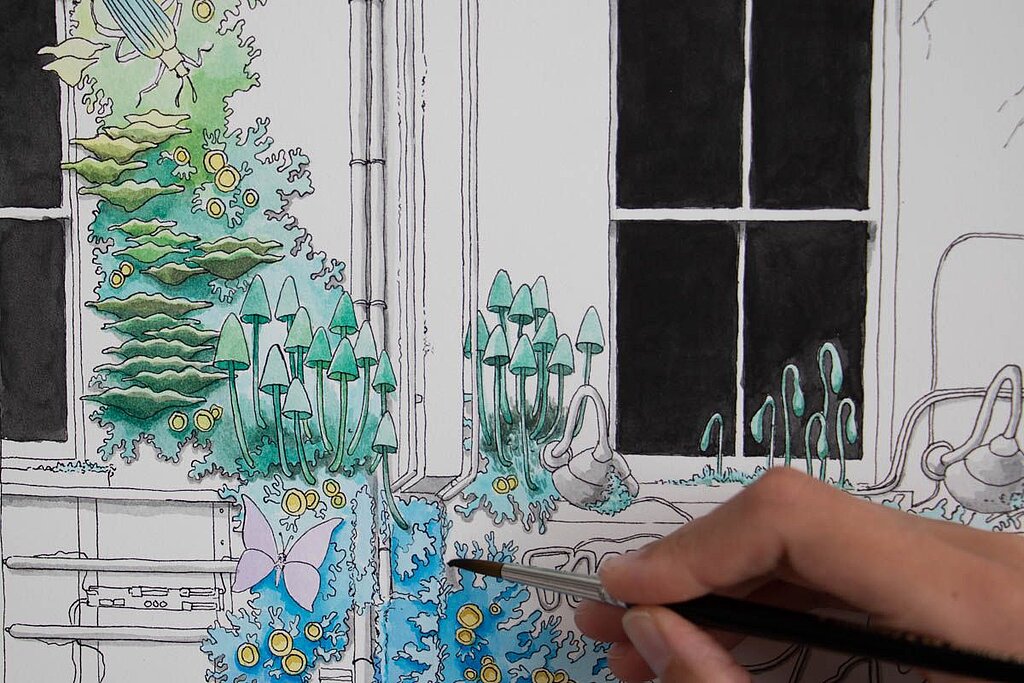
Once my ink drawing is done and dry, I erase the pencil marks. I always start with a light wash of colours, usually in a rainbow gradient of some sort. Here, I started in the center with helio cerulean, went down towards Ultramarine blue, added purple magenta to make purple, and added vermillion to the magenta for a warmer rose in the right corner.
Upwards, I went with cobalt turquoise, transitioned to Viridian, and mixed it with transparent yellow and transparent ochre to goover green and yellow in the upper left corner.
For the lichen cups in the center, I used a mixture of transparent yellow, transparent ochre, and Viridian for a greenish yellow. As for the insects, I chose a different colour to make them pop over the background.
Step 5
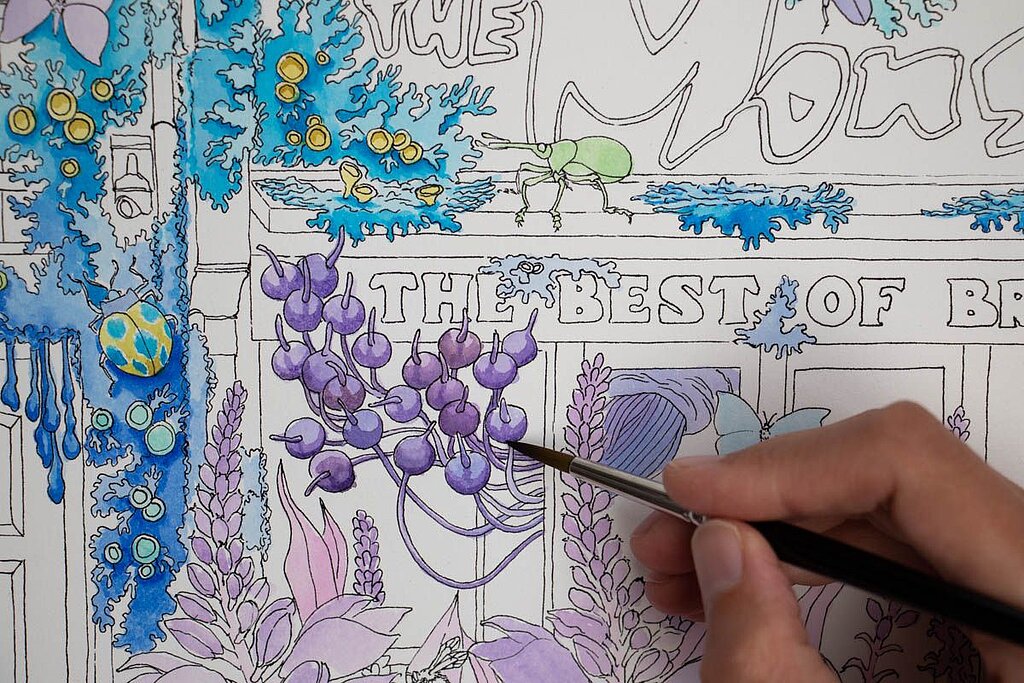
Once all my colours are placed onto the paper, I start adding shadows by using the exact same colours, only less diluted, layering until the painting begins to pop a little more. This is also the moment I might mute specific colours. The purple can be muted with vermillion, the green with transparent ochre.Muting colours is usually a trial and error process, so always try to find the best combination on a test sheet of paper.
Step 6
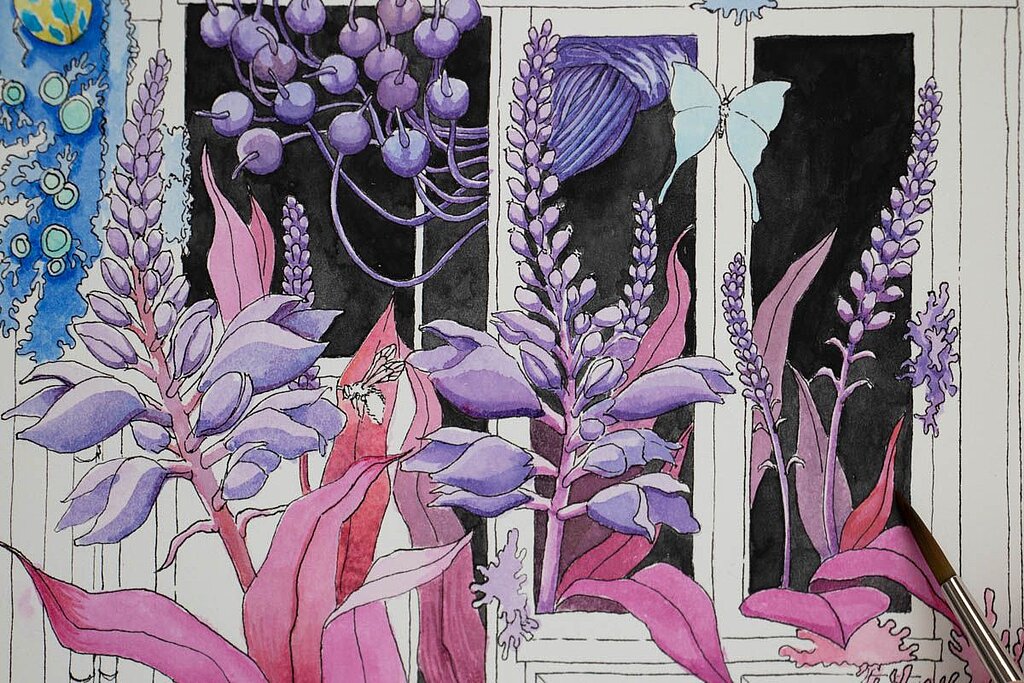
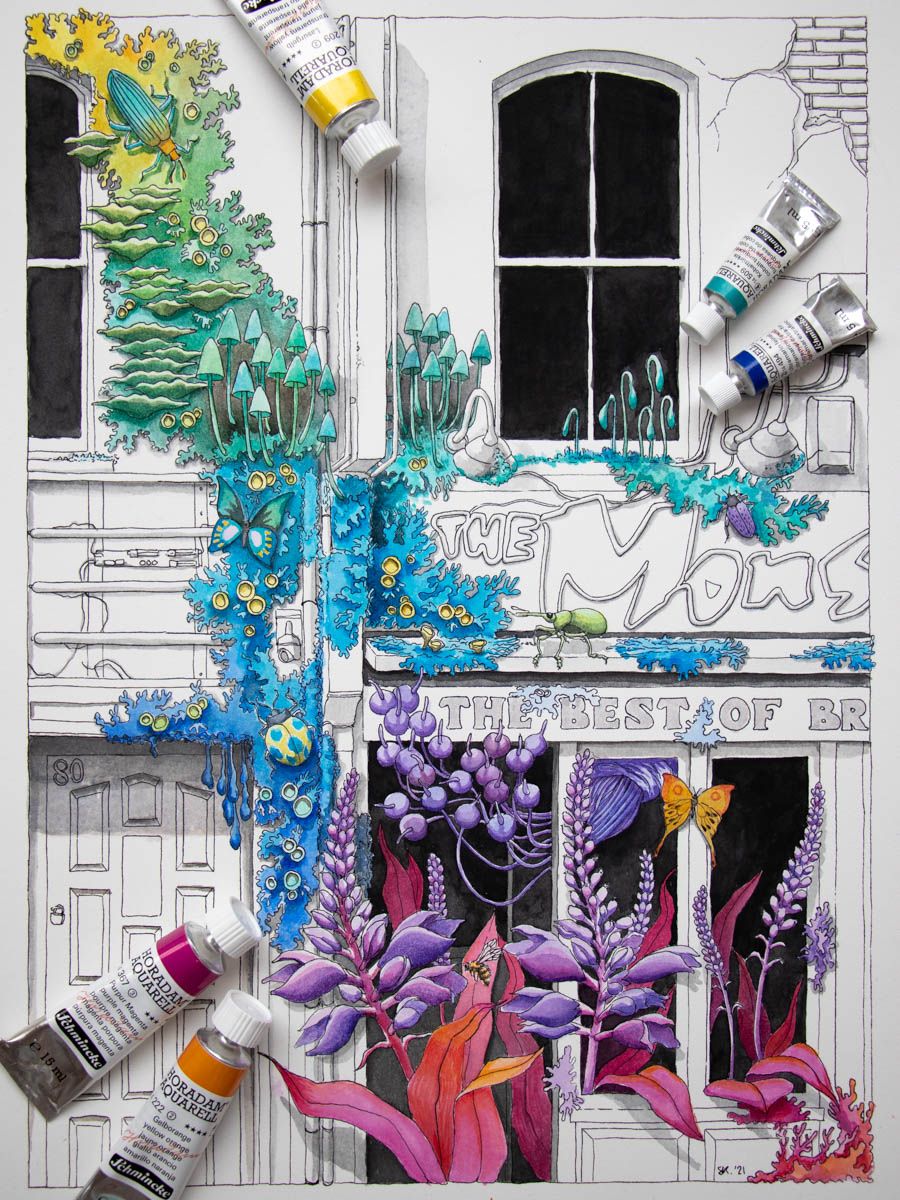
Once I have the first layer of shadows laid down, I like to add the darkest tones. Here I am using lamp black for the windows and openings. You can also start adding cast shadows to the building.
Having the darkest colours in helps me to see how vibrant my colours need to be. I like using black straight out of the tube for a punch, but that means the rest of the painting has to keep up in terms of vibrancy.
Step 7
Once I see where I want to be, I keep on layering colours and shadows until they don't look pale next to the black. It's easier to do light washes until you get the result you want. If you go in with very dark colours right away, you can't go back. Layering a lot will help to control your painting better.
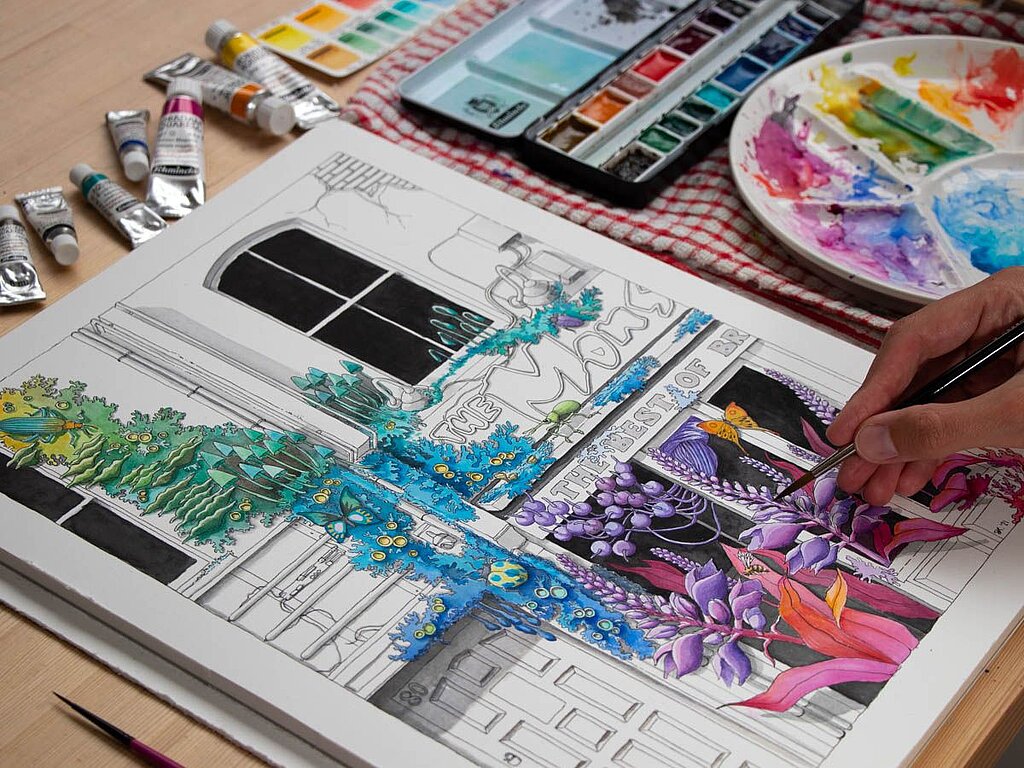
Step 8
Now, this painting looked too cold for my liking, so I went back in and decided to layer on warmer colours in the upper left and bottom right sides. Over the purple magenta, I added some vermillion and yellow orange for a punch. The key is not to cover all of the magenta but instead, partially cover some areas. I also added some purple magenta into the purple. You want to make the colours dance and bounce back and forth to keep it interesting.
In the upper left corner, I added some transparenty ellow and yellow orange. I mixed a warmer, more realistic green with Viridian and yellow orange and layered it on the lichen. Then it's a matter of pushing the painting further and further until you're happy with it. It also helps to leave it aside for a few days and go back with fresh eyes.
The Artist

Inspired by natural forms, Stéphanie Kilgast's artwork is an ode to nature and its current biodiversity. Plants, mushrooms, insects, and other animals encounter in a vibrant swirl of colours under her brush or sculpting tools.
Since 2017, in her series "Discarded Objects", she grows colourful organic sculptures on manufactured objects, celebrating the beauty of nature in a dialogue with humanity, questioning the lost balance between human activities and nature. Her work has a cheerful post-apocalyptic feel to it, a reassuring reminder that nature has the capacity to grow back, if we only let it. Her work has been exhibited in North America, Asia, Australia, and Europe. French, born in 1985, Frankfurt am Main, Germany, currently resides in Vannes, France.
Webseite: www.stephaniekilgast.com
Instagram, Facebook und twitter: @petitplat
YouTube: www.youtube.com/petitplatfr
Further artworks by Stéphanie Kilgast


